and the distribution of digital products.
Meta Tutorial In Games: How It Works and Why It’s Useful
Hi everyone! My name is Alexey Tsigelnikov, and I’m a developer on the War Robots project at MY.GAMES (Pixonic). Any respectable game with multiple layers of content has tutorials — not only to help players understand the gameplay but also, importantly, to help them navigate the meta layer. In this article, I’ll talk about the second type of tutorial — why it exists in our project and how it works.
\
Why Is a Tutorial NeededWar Robots consists of two parts: the battle part and the meta part. In the battle part, the player engages in combat against other players and bots. In the meta part, the player manages their hangar — buying, selling, and upgrading robots and weapons, spending and earning currency, joining clans, completing quests, and more.
\ This article focuses on the tutorial system implemented in the meta part of the game. To help users better understand how the game’s various mechanics work, we created a tutorial system. Its goal is to show users what actions they need to take to achieve certain outcomes — for example, tutorials explain how to buy a new robot, upgrade weapons, obtain a pilot, and perform other similar tasks.
\
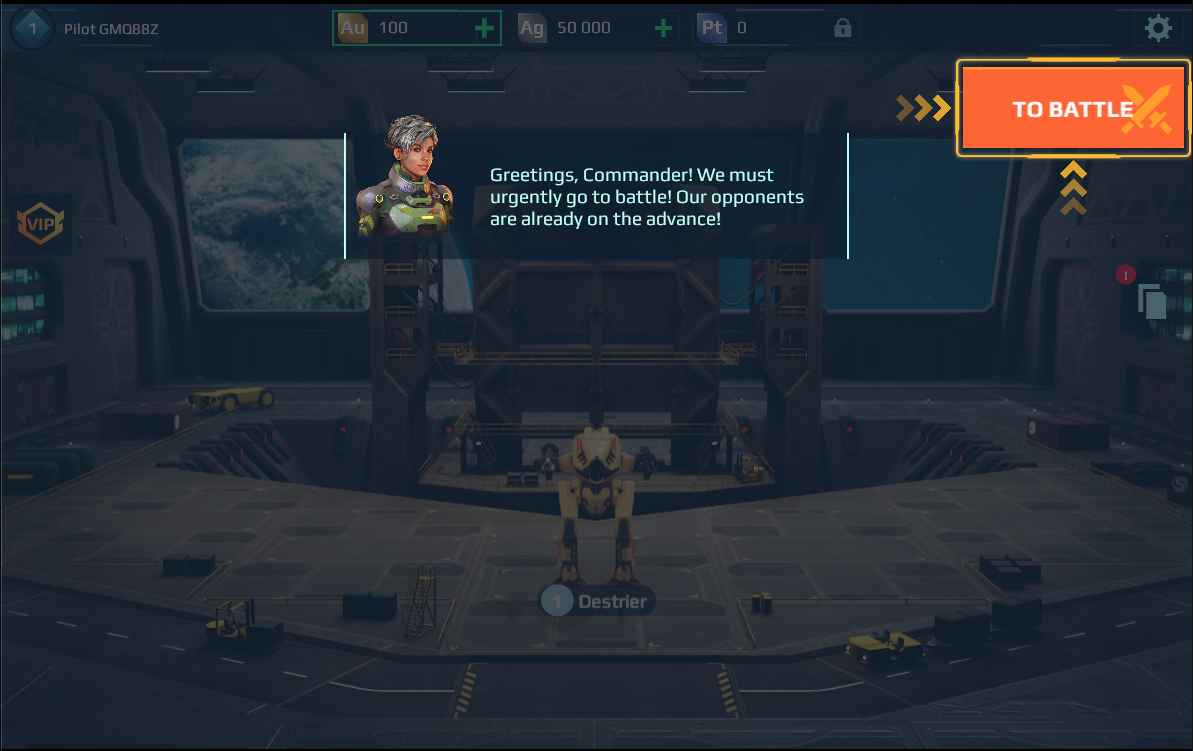
\ The tutorial consists of a set of markers that introduce players to new mechanics and guide them through interacting with them.
Players are incentivized to complete tutorials through quest rewards. These may be granted automatically upon completing a tutorial (accompanied by a popup), or the player may need to manually claim them from the quest window.
\
Tutorial ArchitectureOur tutorial system is configured in three parts:
Visual settings for the tutorial are stored in a table-based config on the server.
Tutorial components are placed in the prefabs of UI screens and dialog windows. This is configured on the client.
Tutorial definitions and markers, also in a table-based config stored on the server.
\
General tutorial settings are received from the server when the player logs in. These include the following flags:
- Show helper character: yes/no
- Enable screen dimming: yes/no
- Allow removing dimming only by clicking the highlighted element: yes/no
\
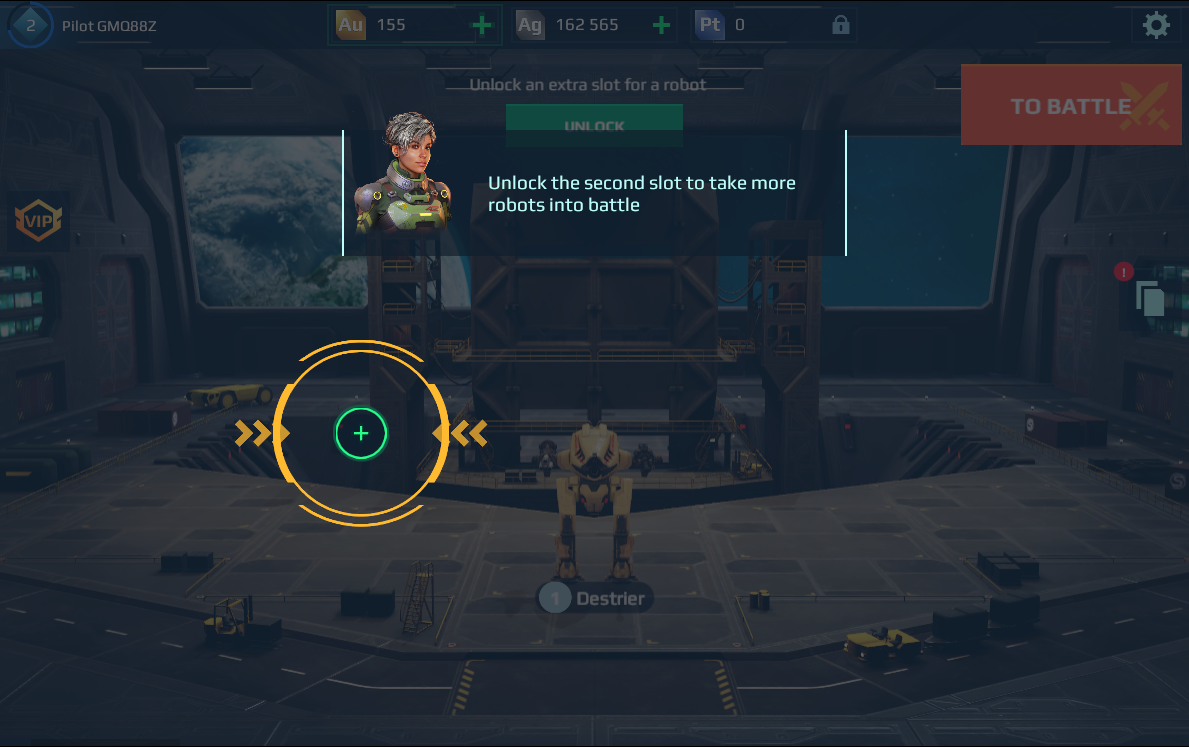
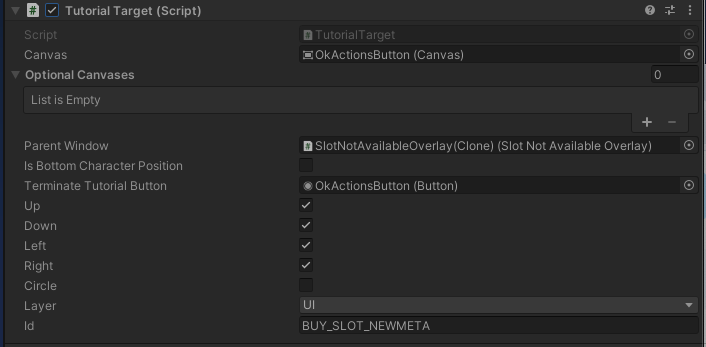
\ Setting up tutorial components in the dialog box prefabs. To display a tutorial marker on screen, a TutorialTarget component must be added to the UI element, with the appropriate parameters configured:
\
\
- Canvas — if this field is filled, the element will be highlighted above the dimming layer.
- Optional Canvases — if populated, elements from these canvases will also be highlighted when dimming is active.
- Parent Window — used if the marker is part of a dialog window.
- Is Bottom Character Position — determines whether the helper character appears at the bottom or top of the screen.
- Terminate Tutorial Button — if set, the tutorial ends early when the button is clicked.
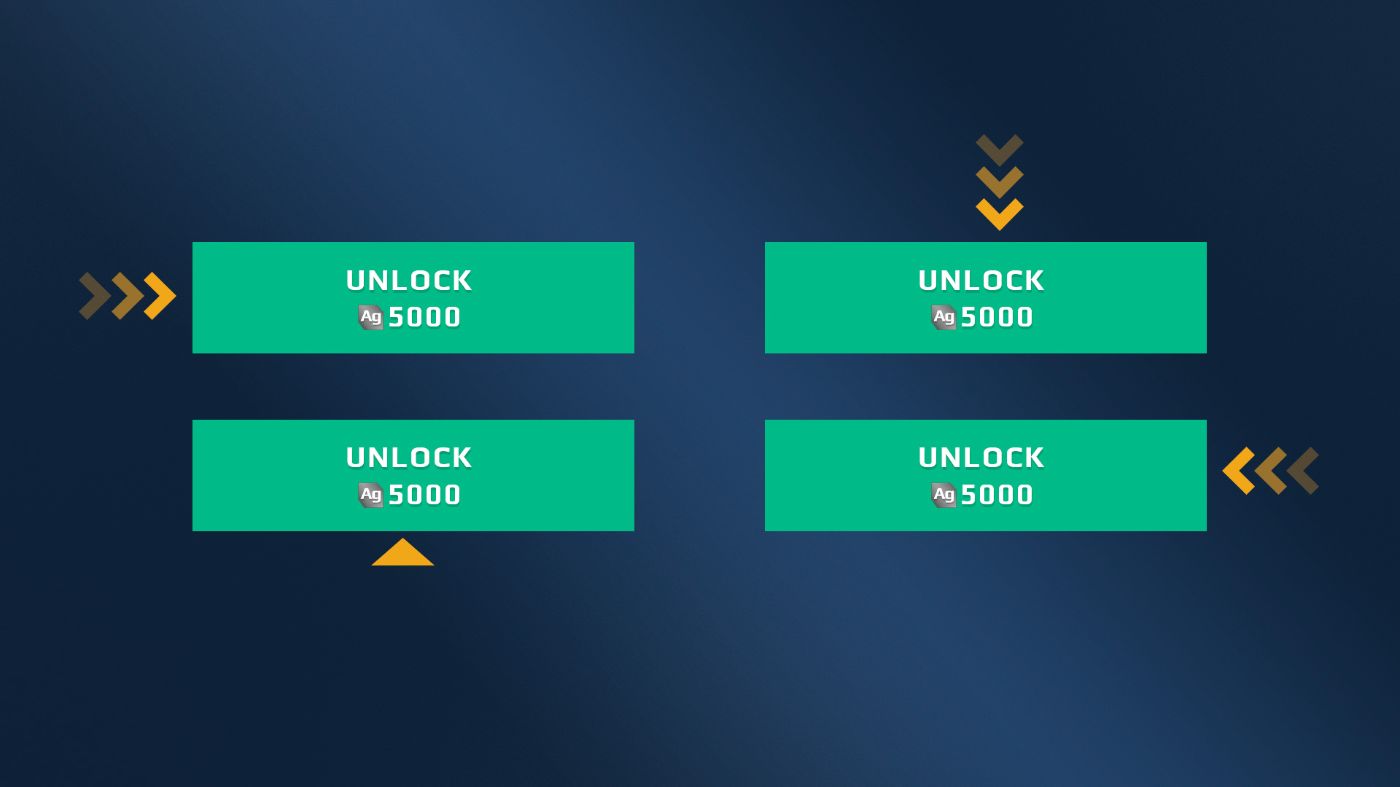
- Up / Down / Left / Right — enable directional arrows for the marker.
\
\
Circle — enables a circular element in the center of the marker.
Layer — defines the rendering layer for the marker.
Id — unique identifier of the tutorial marker.
\
List of tutorials and their markers. On the server, a tutorial config stores information about tutorials, their markers, and the text for the helper character. For example, tutor1 contains the following Id markers: GOTOBATTLE, GOTOGARAGE, BUY_SLOT.
\ The GOTOBATTLE marker displays the helper character with text localized using the tag "hello_text". Note: the order of markers in the config does not determine their display priority. Any marker will appear as long as its Id is specified in the TutorialTarget component.
\
| tutorialId | Id | characterText | |----|----|----| | tutor1 | GOTOBATTLE | “hellotext” | | \n | GOTOGARAGE | \n | | \n | BUYSLOT | \n | | tutor2 | BUYROBOT | \n | | \n | UPGRADEROBOT | “upgradingrobottext” |
\
How It Works.- When the game launches, the client receives the general tutorial settings (e.g. whether to show dimming or display helper character text).
- The server sends the current active tutorial to the client, which includes a list of marker IDs.
- When a UI screen (prefab) is opened, components on that screen check if their Id exists in the active tutorial.
- If a match is found, the tutorial marker is activated and displayed.
\
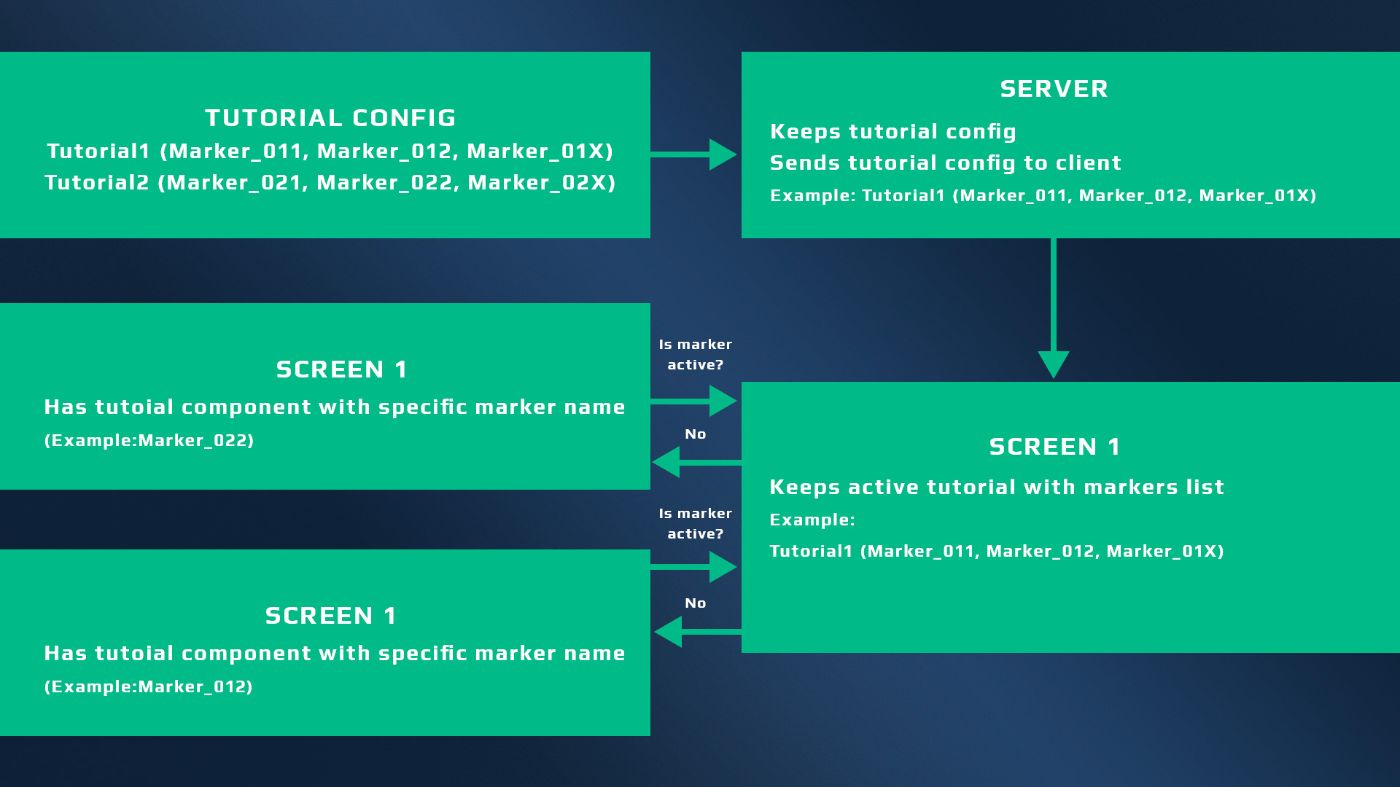
\ Important: The marker itself does not know the step order, reward triggers, or when a tutorial is completed. These decisions are handled entirely by the server.
\ For example, in the tutorial for purchasing a robot, the marker simply highlights the relevant UI buttons. Only after the player successfully buys the robot does the server register the action, grant the reward, and potentially send a new tutorial to the client.
\
Pros and Cons of This Approach Pros:- No new code is required to add new tutorials.
- Easy to scale and expand. Game designers can create new tutorials using existing markers.
- Tutorial progress is stored server-side.
- Tutorials can be updated without releasing a new client version — config is server-side, and prefabs can be updated via bundles.
Requires synchronization of marker IDs between server and client.
String-based marker IDs are prone to errors in the config.
Debugging and validation tools are required.
Every tutorial needs manual testing.
\
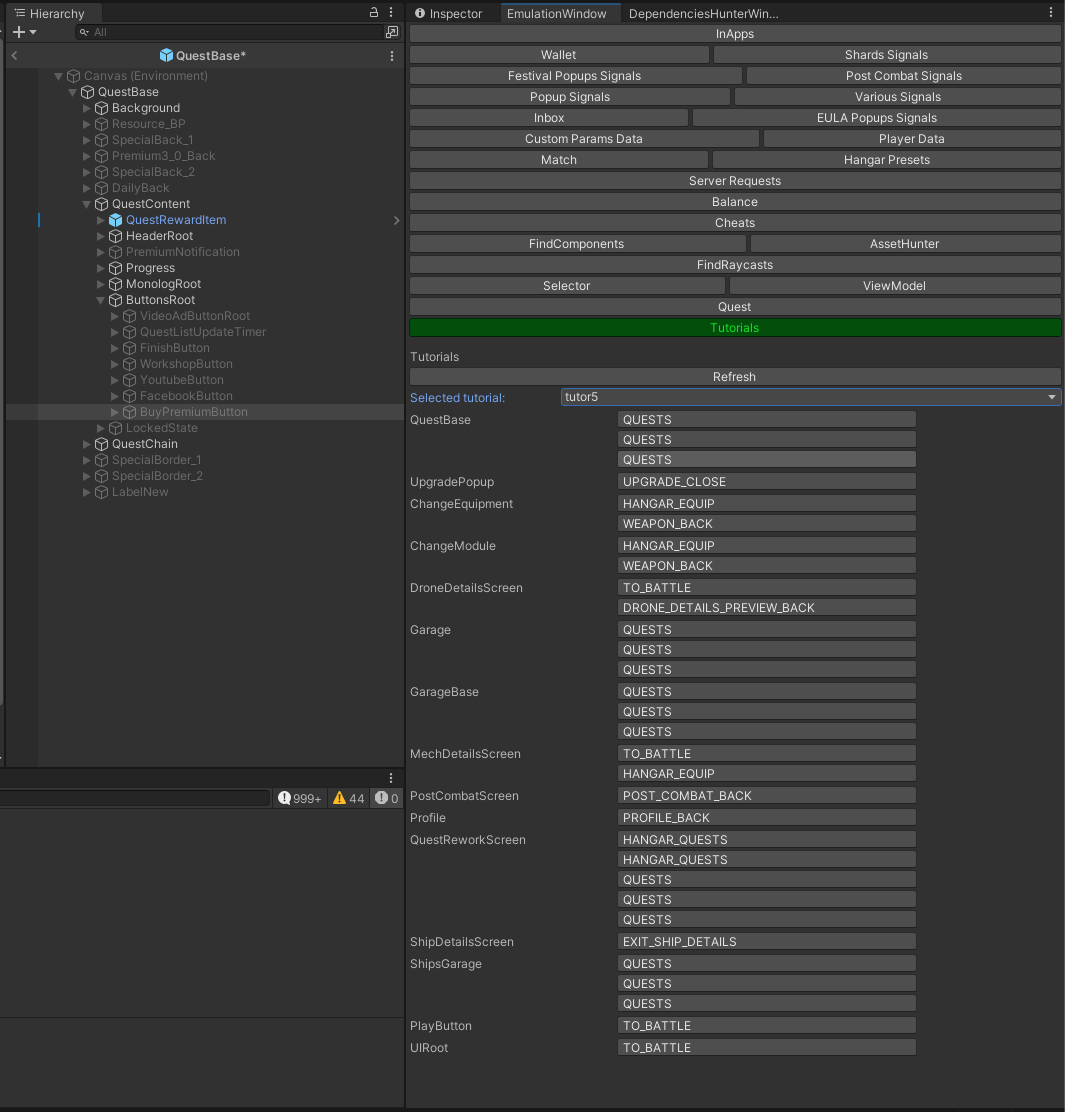
To make it easier to customize and test tutorials, we have created the following tools:
- Tutorial marker search tool. Helps locate and configure tutorial markers within prefabs. Users can select a tutorial, see all related prefabs and markers, and click to open a prefab with the target object auto-selected.
\
\
A cheat tool for playing tutorials. Allows for testing any tutorial by enabling its markers in either an "incomplete" or "completed" phase.
\
Move the tutorial config to the client. This will eliminate server dependency and reduce the likelihood of configuration errors. The config will still be updatable via bundles, without needing a new client build.
Render all tutorial markers in a single canvas. This will improve performance and simplify rendering logic.
\
The current tutorial system effectively introduces players to various game mechanics using a combination of markers and helper character dialogues.
\ It offers powerful customization options — including visual settings, directional arrows, character text, and filters for specific robot or weapon types.
\ Game designers can create and modify tutorials and deploy updates without requiring programmer involvement.